
Authored content is a content type that provides you with tools to build custom content within Loop. This type can be used flexibly for use cases such as:
- Providing guidance or information using freeform text, videos, and images
- Surveying learners utilizing freeform text blocks and single/multiple answer questions without correct or incorrect answers
- Creating a knowledge check with pass/fail thresholds, point values, correct/incorrect answers and answer feedback.
For the learner side of authored content, view here.
Authored Content Details
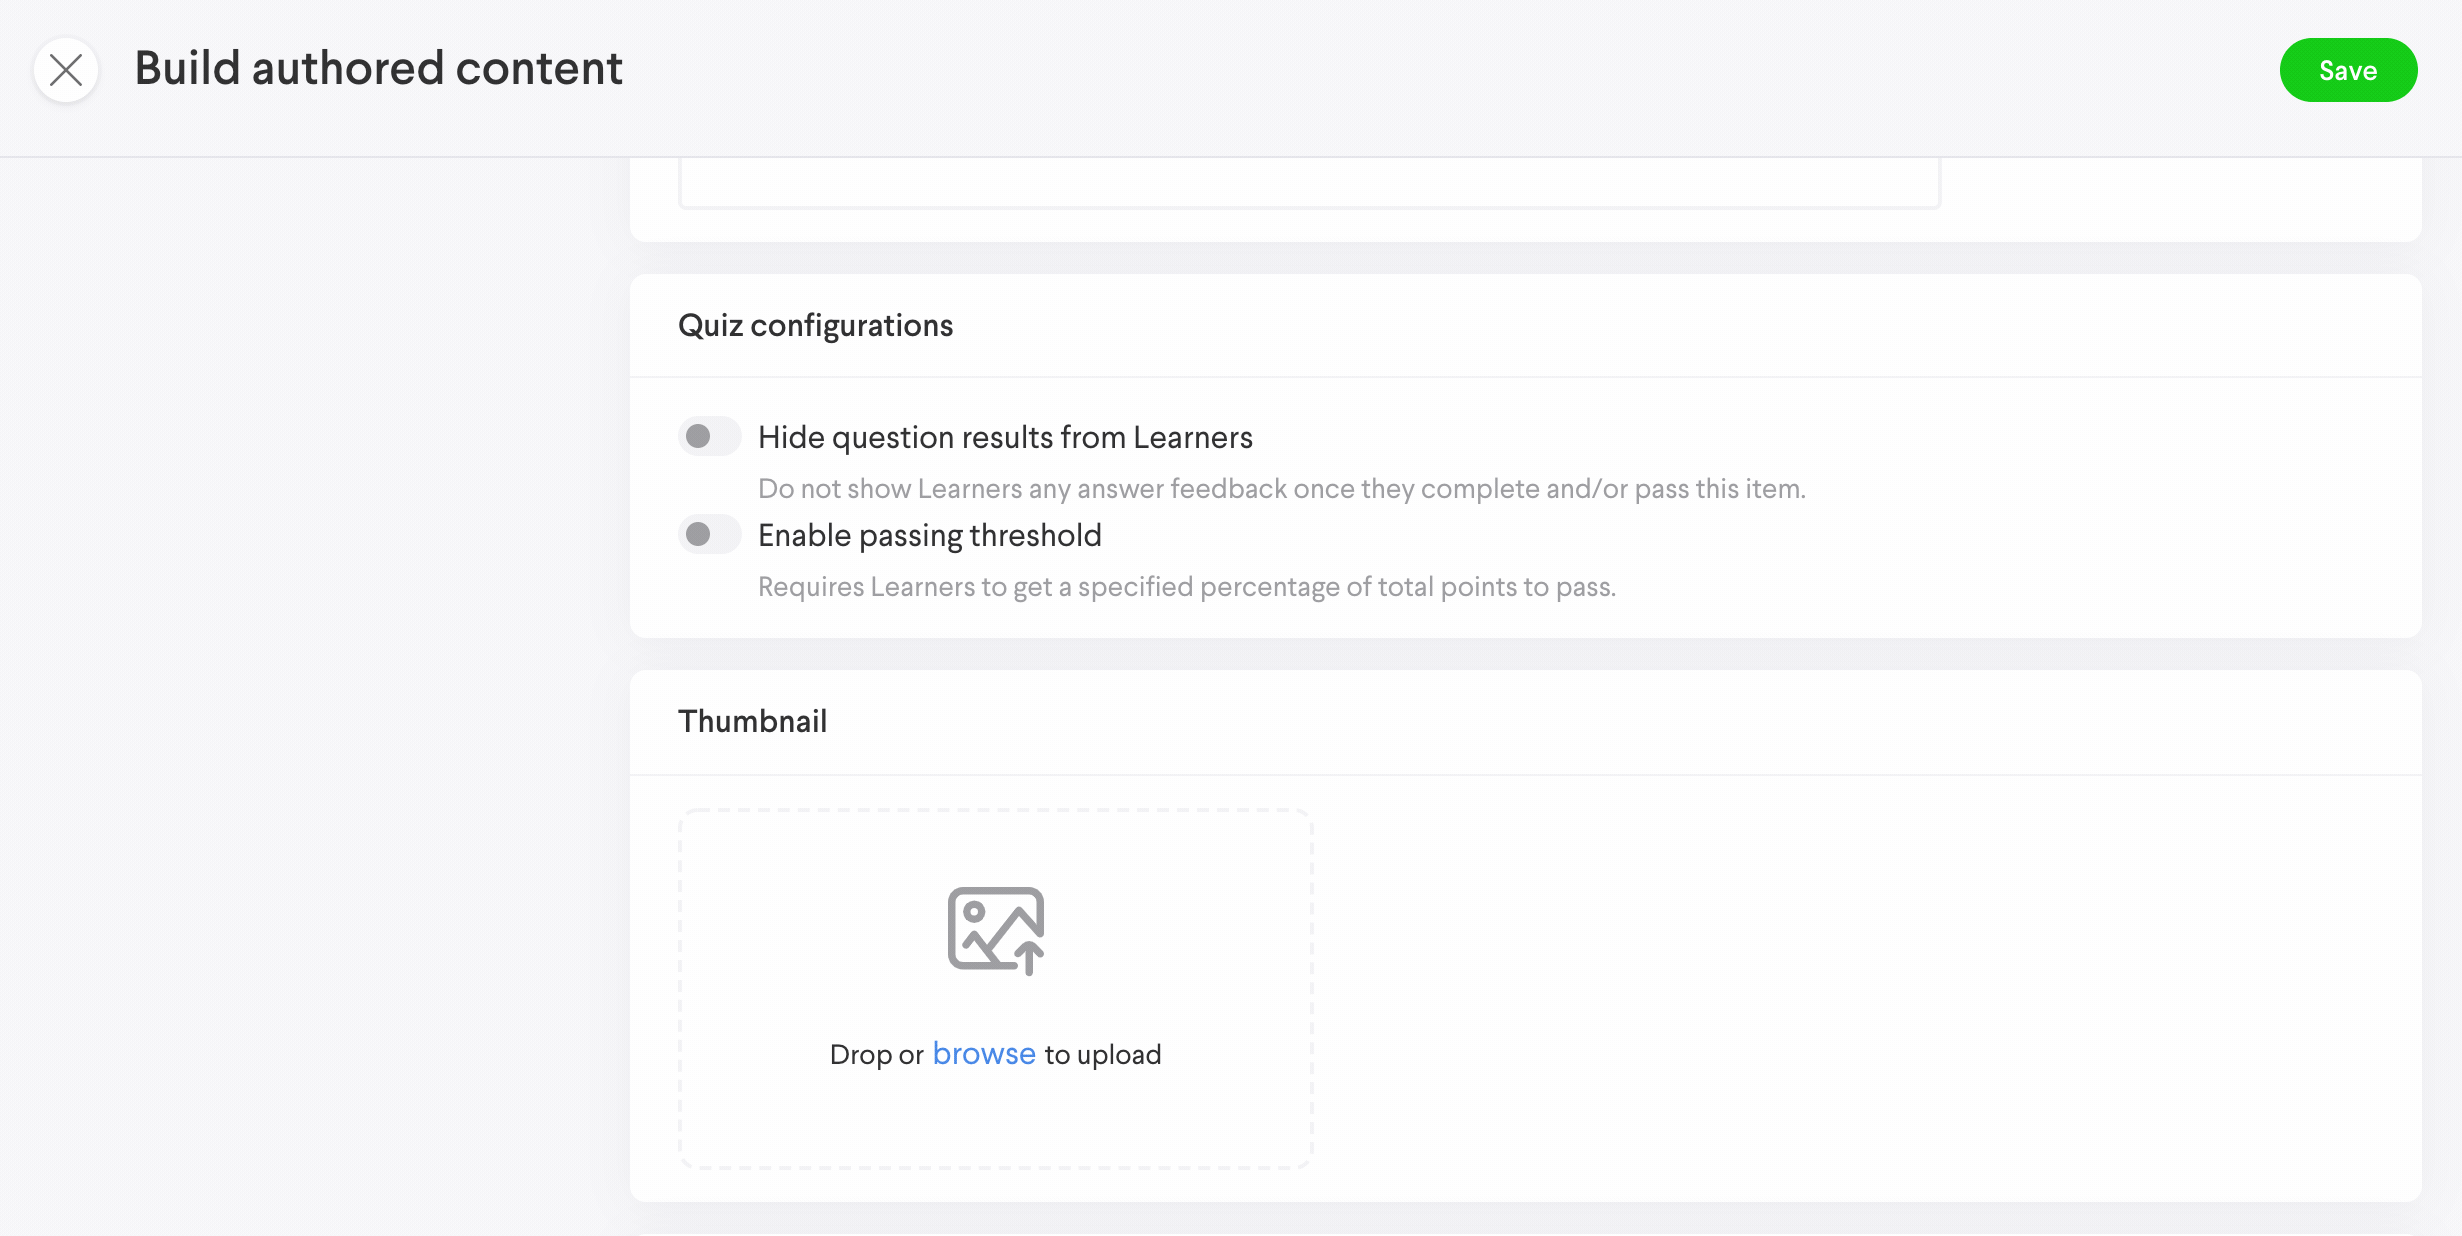
Quiz Configuration
In the Details section of the authored content creation or edit forms you can set the quiz configuration which contains two toggle options
- Hide question results from Learners
- Enabling this prevents learners from seeing if they got a questions correct or incorrect after submitting an answer. It also disables feedback visibility
- Enable passing threshold
- With this option enabled you can set percentage score that a learner must have for them to pass. The pass/fail status doesn't permit or prevent learners from completing the authored content. It is a separate metric unrelated to content completion within Loop. If this option is enabled it is required that at least 1 question has a score value greater than 0. Otherwise you won't be able to submit the creation or edit form.
- Require passing score for completion
- A passing score can be required before the authored content can be submitted. If a learner fails to reach the threshold, they will receive a "try again" option which resets their answers. There is currently no limit on the number of retries.
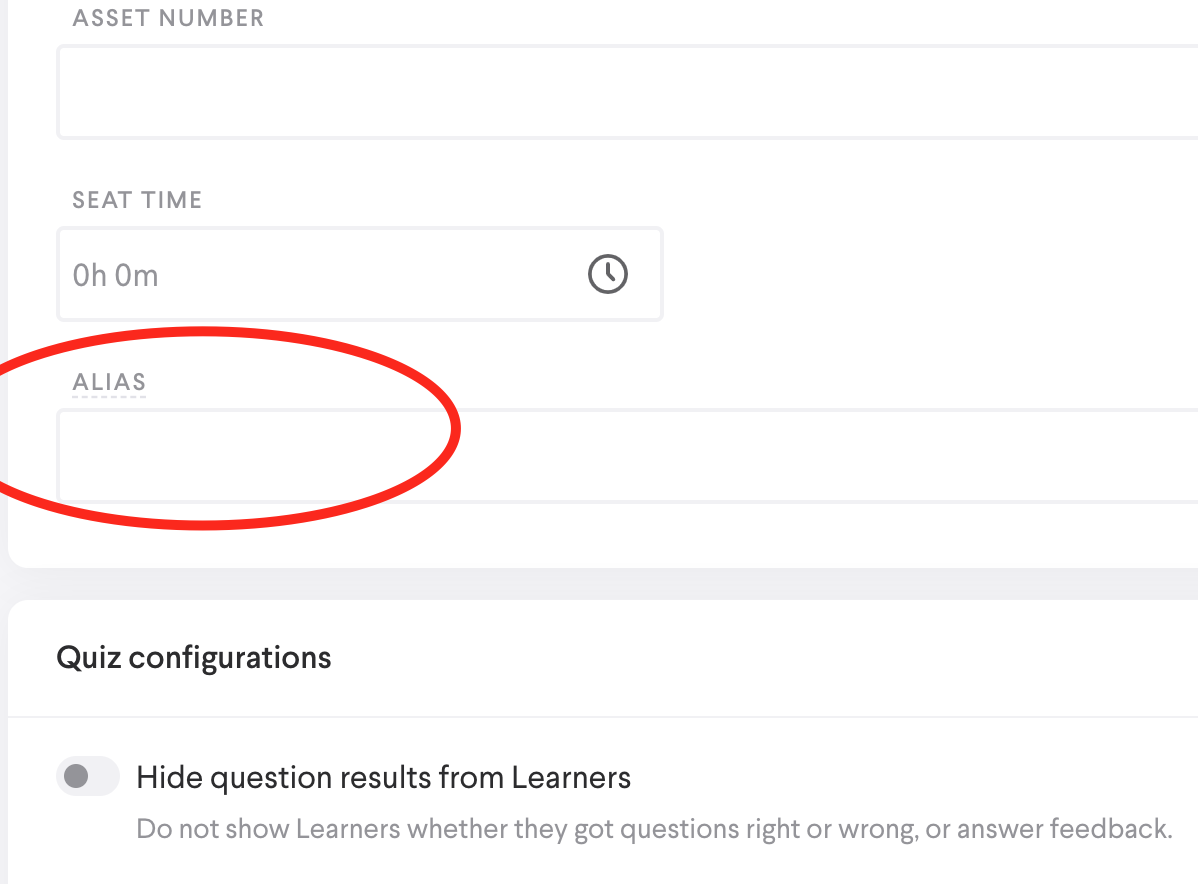
Alias
The alias field resides in the Basic info sub section of the Details tab in the creation or edit forms. This lets you change the name of the content type as it appears to learners. For example; instead of Authored Content it can be changed to Quiz.
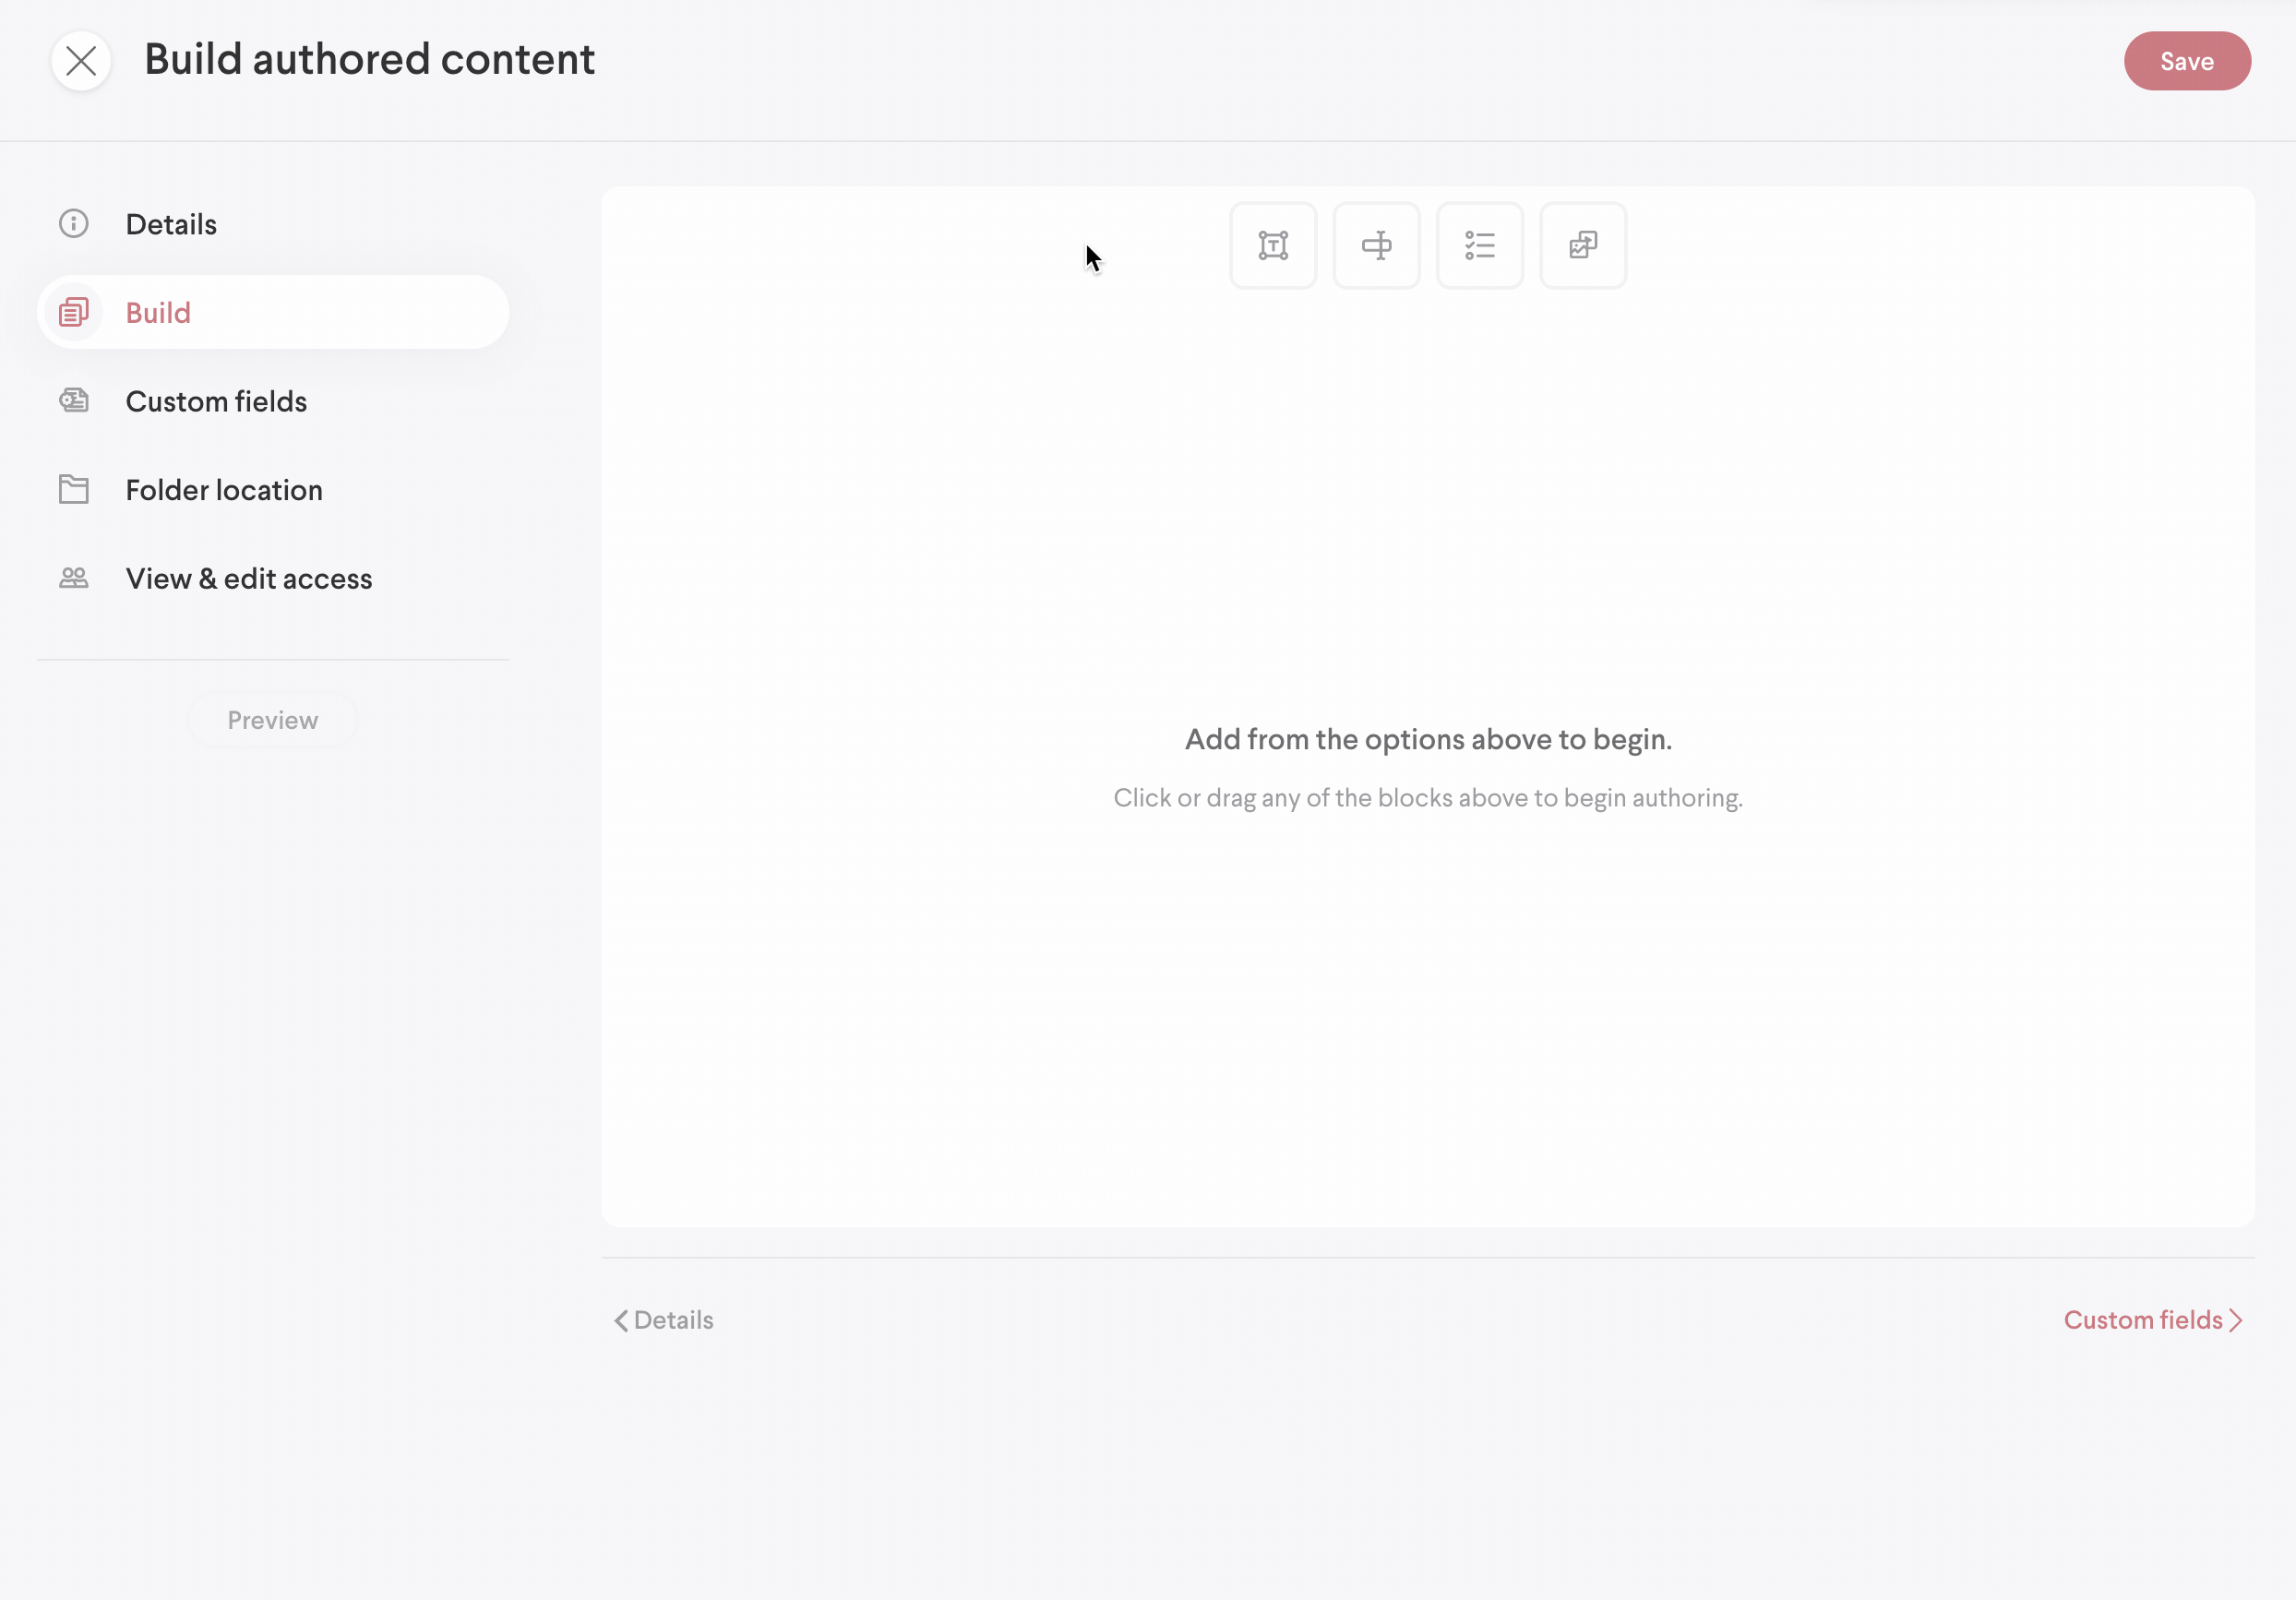
Building
- As a content admin, select the Folders & Content tab, then to the upper right of the table select the create action (+)
- Select Build authored content from the options
- Fill out the form fields as needed. (title is required)
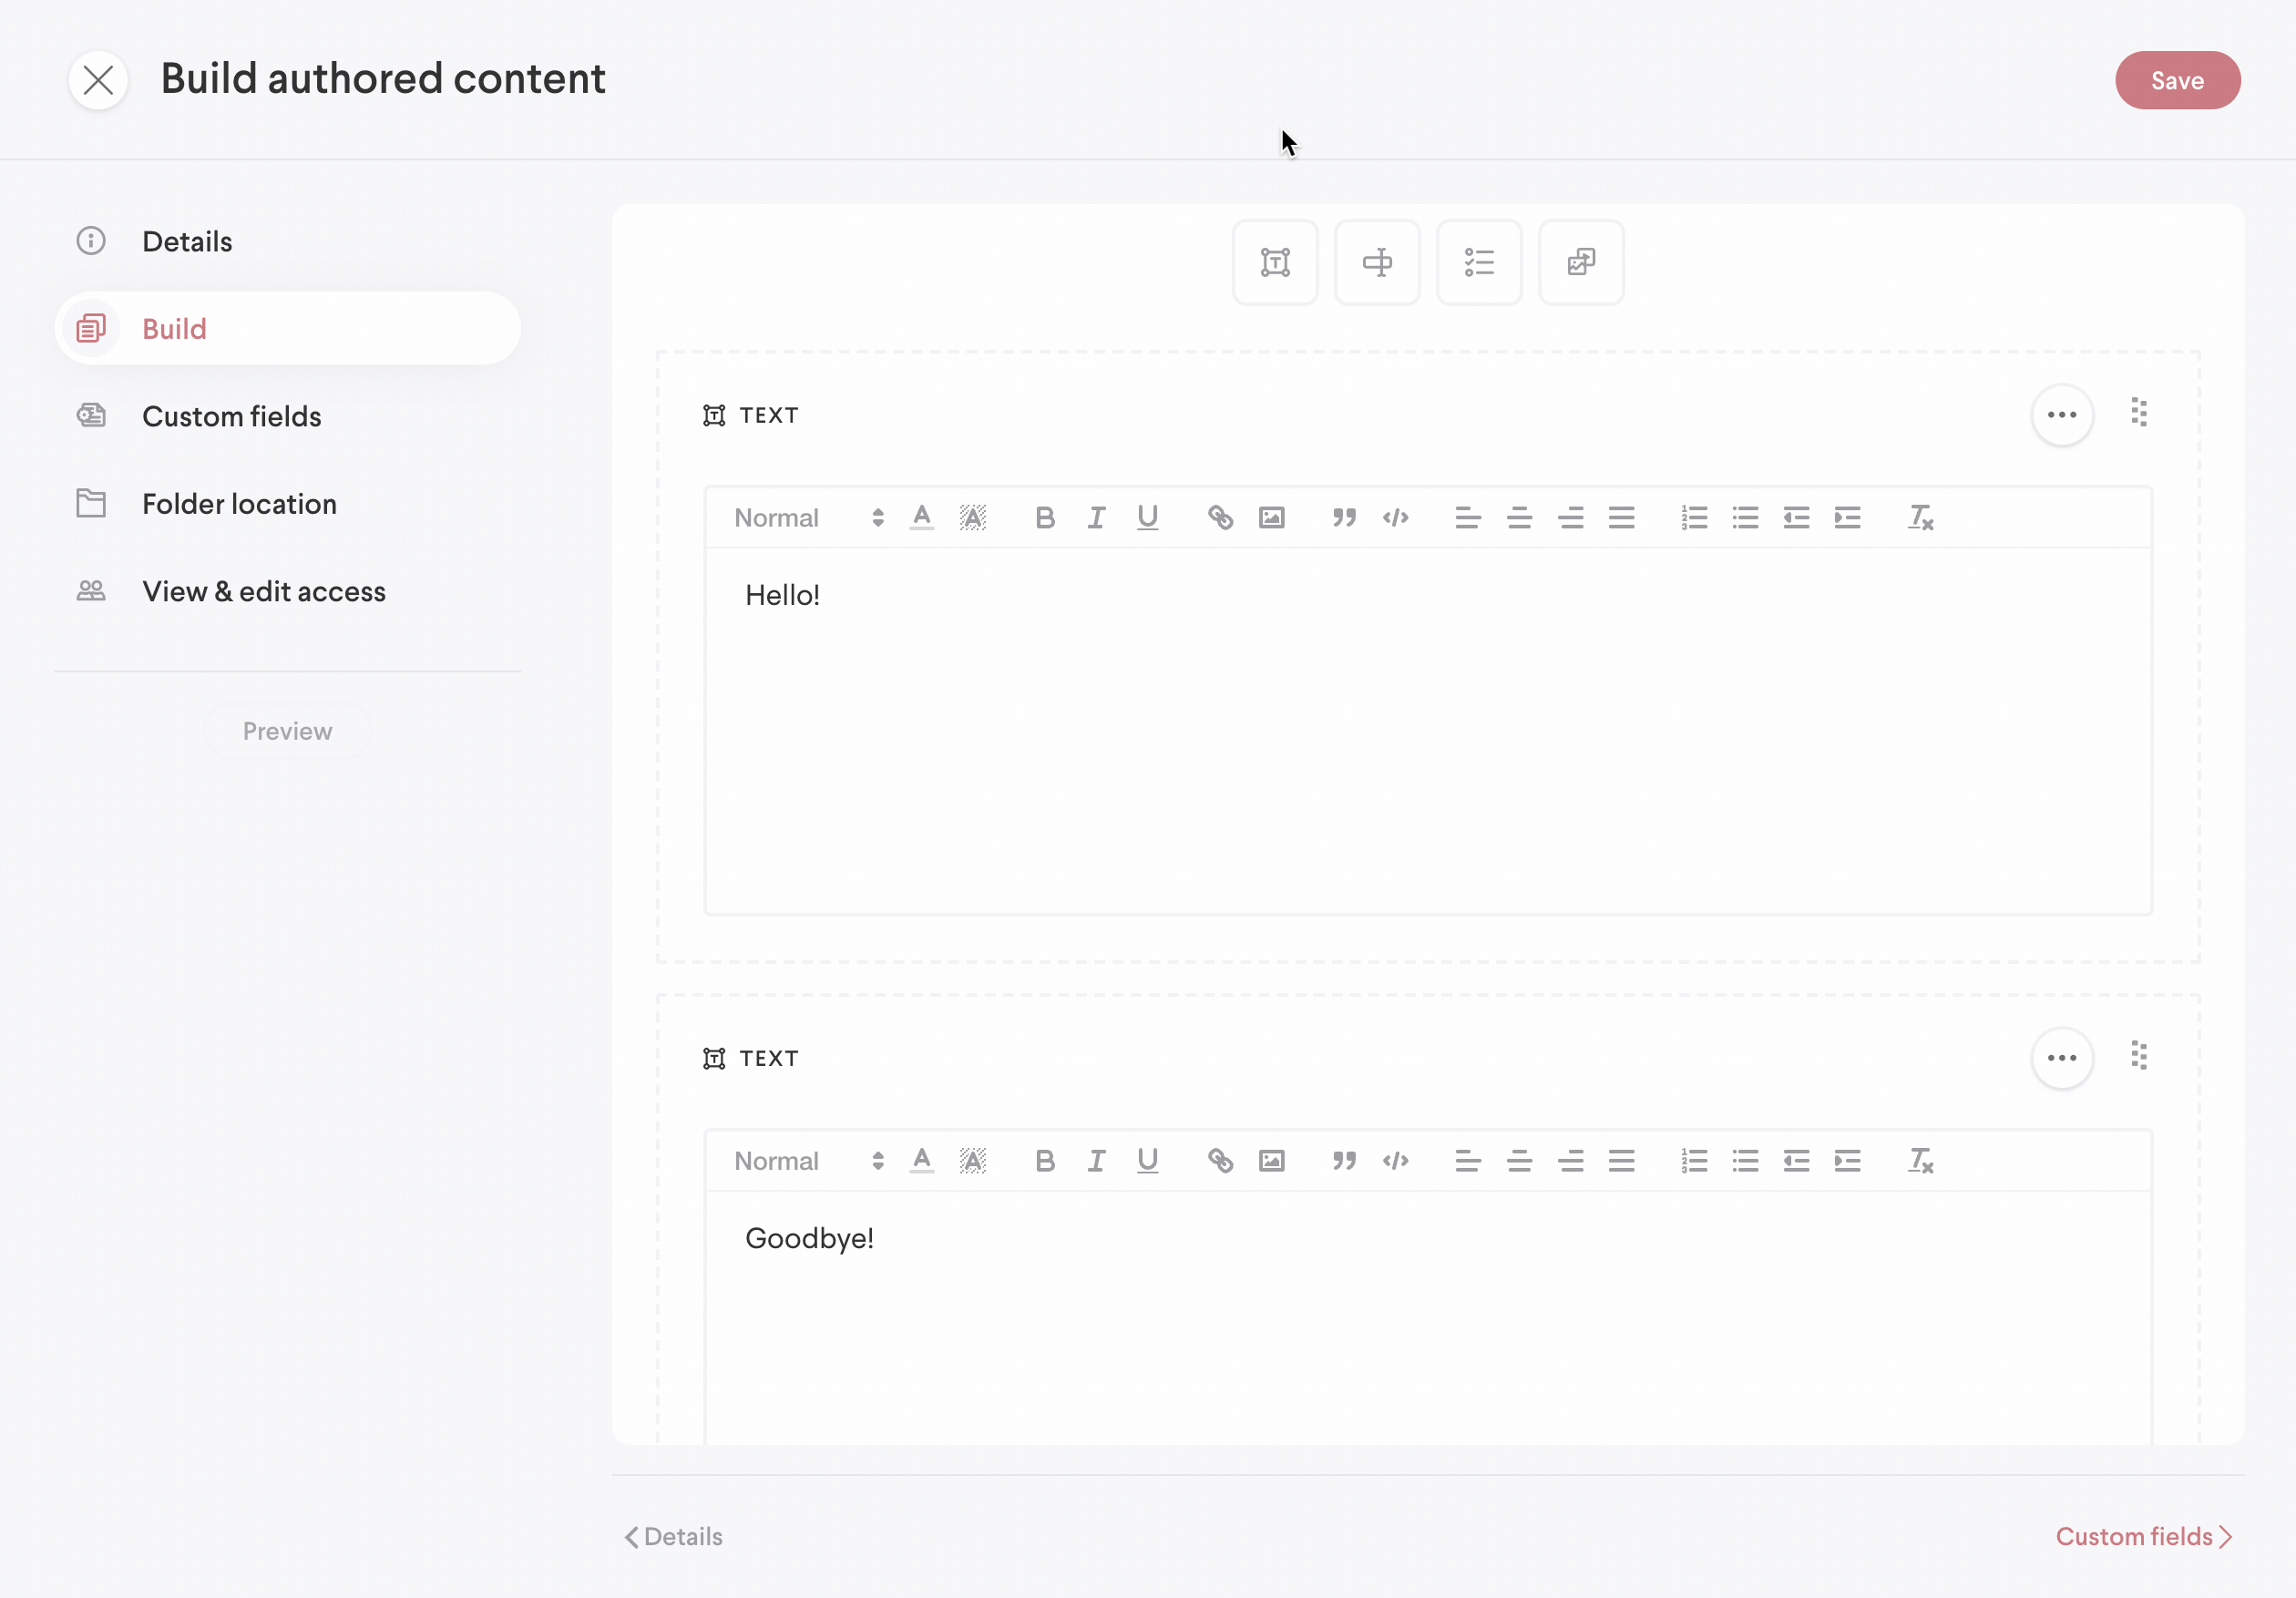
- Select the Build tab
In the Build tab you will see four block type options.
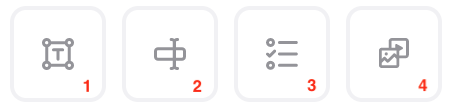
1. Text
-
- Create or paste in text that will appear to the learner. Rich text is supported, including options like like alignment, character formatting, hyperlinks, and more.
- Create or paste in text that will appear to the learner. Rich text is supported, including options like like alignment, character formatting, hyperlinks, and more.
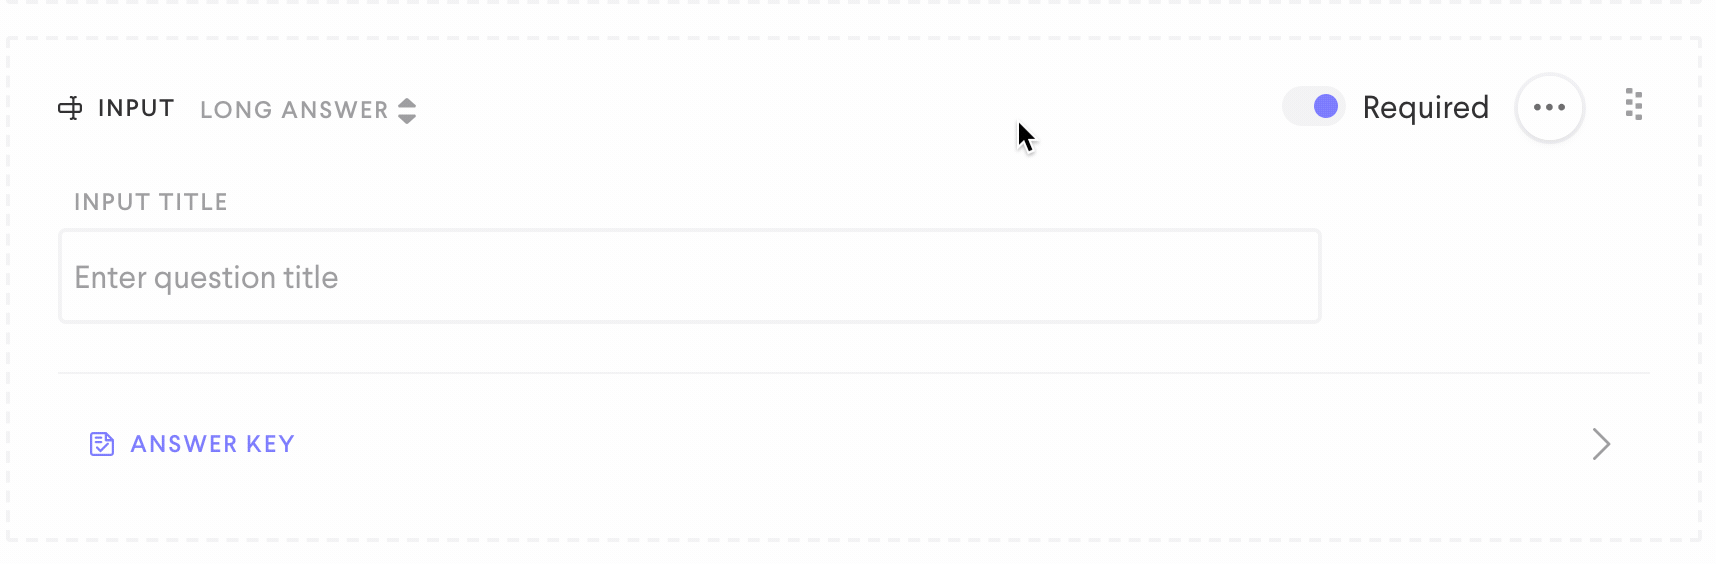
2. Input
-
-
- Short answer: Learners can respond with written free text. Admin can add one to many answers that check the learner's response and mark correct or incorrect
- Long answer: Learners can respond with written free text
- Date
- Numeric
- Phone Number
- Address
- Acknowledgement
- File Upload: Learners can upload a file and an admin or coach can download to view
-
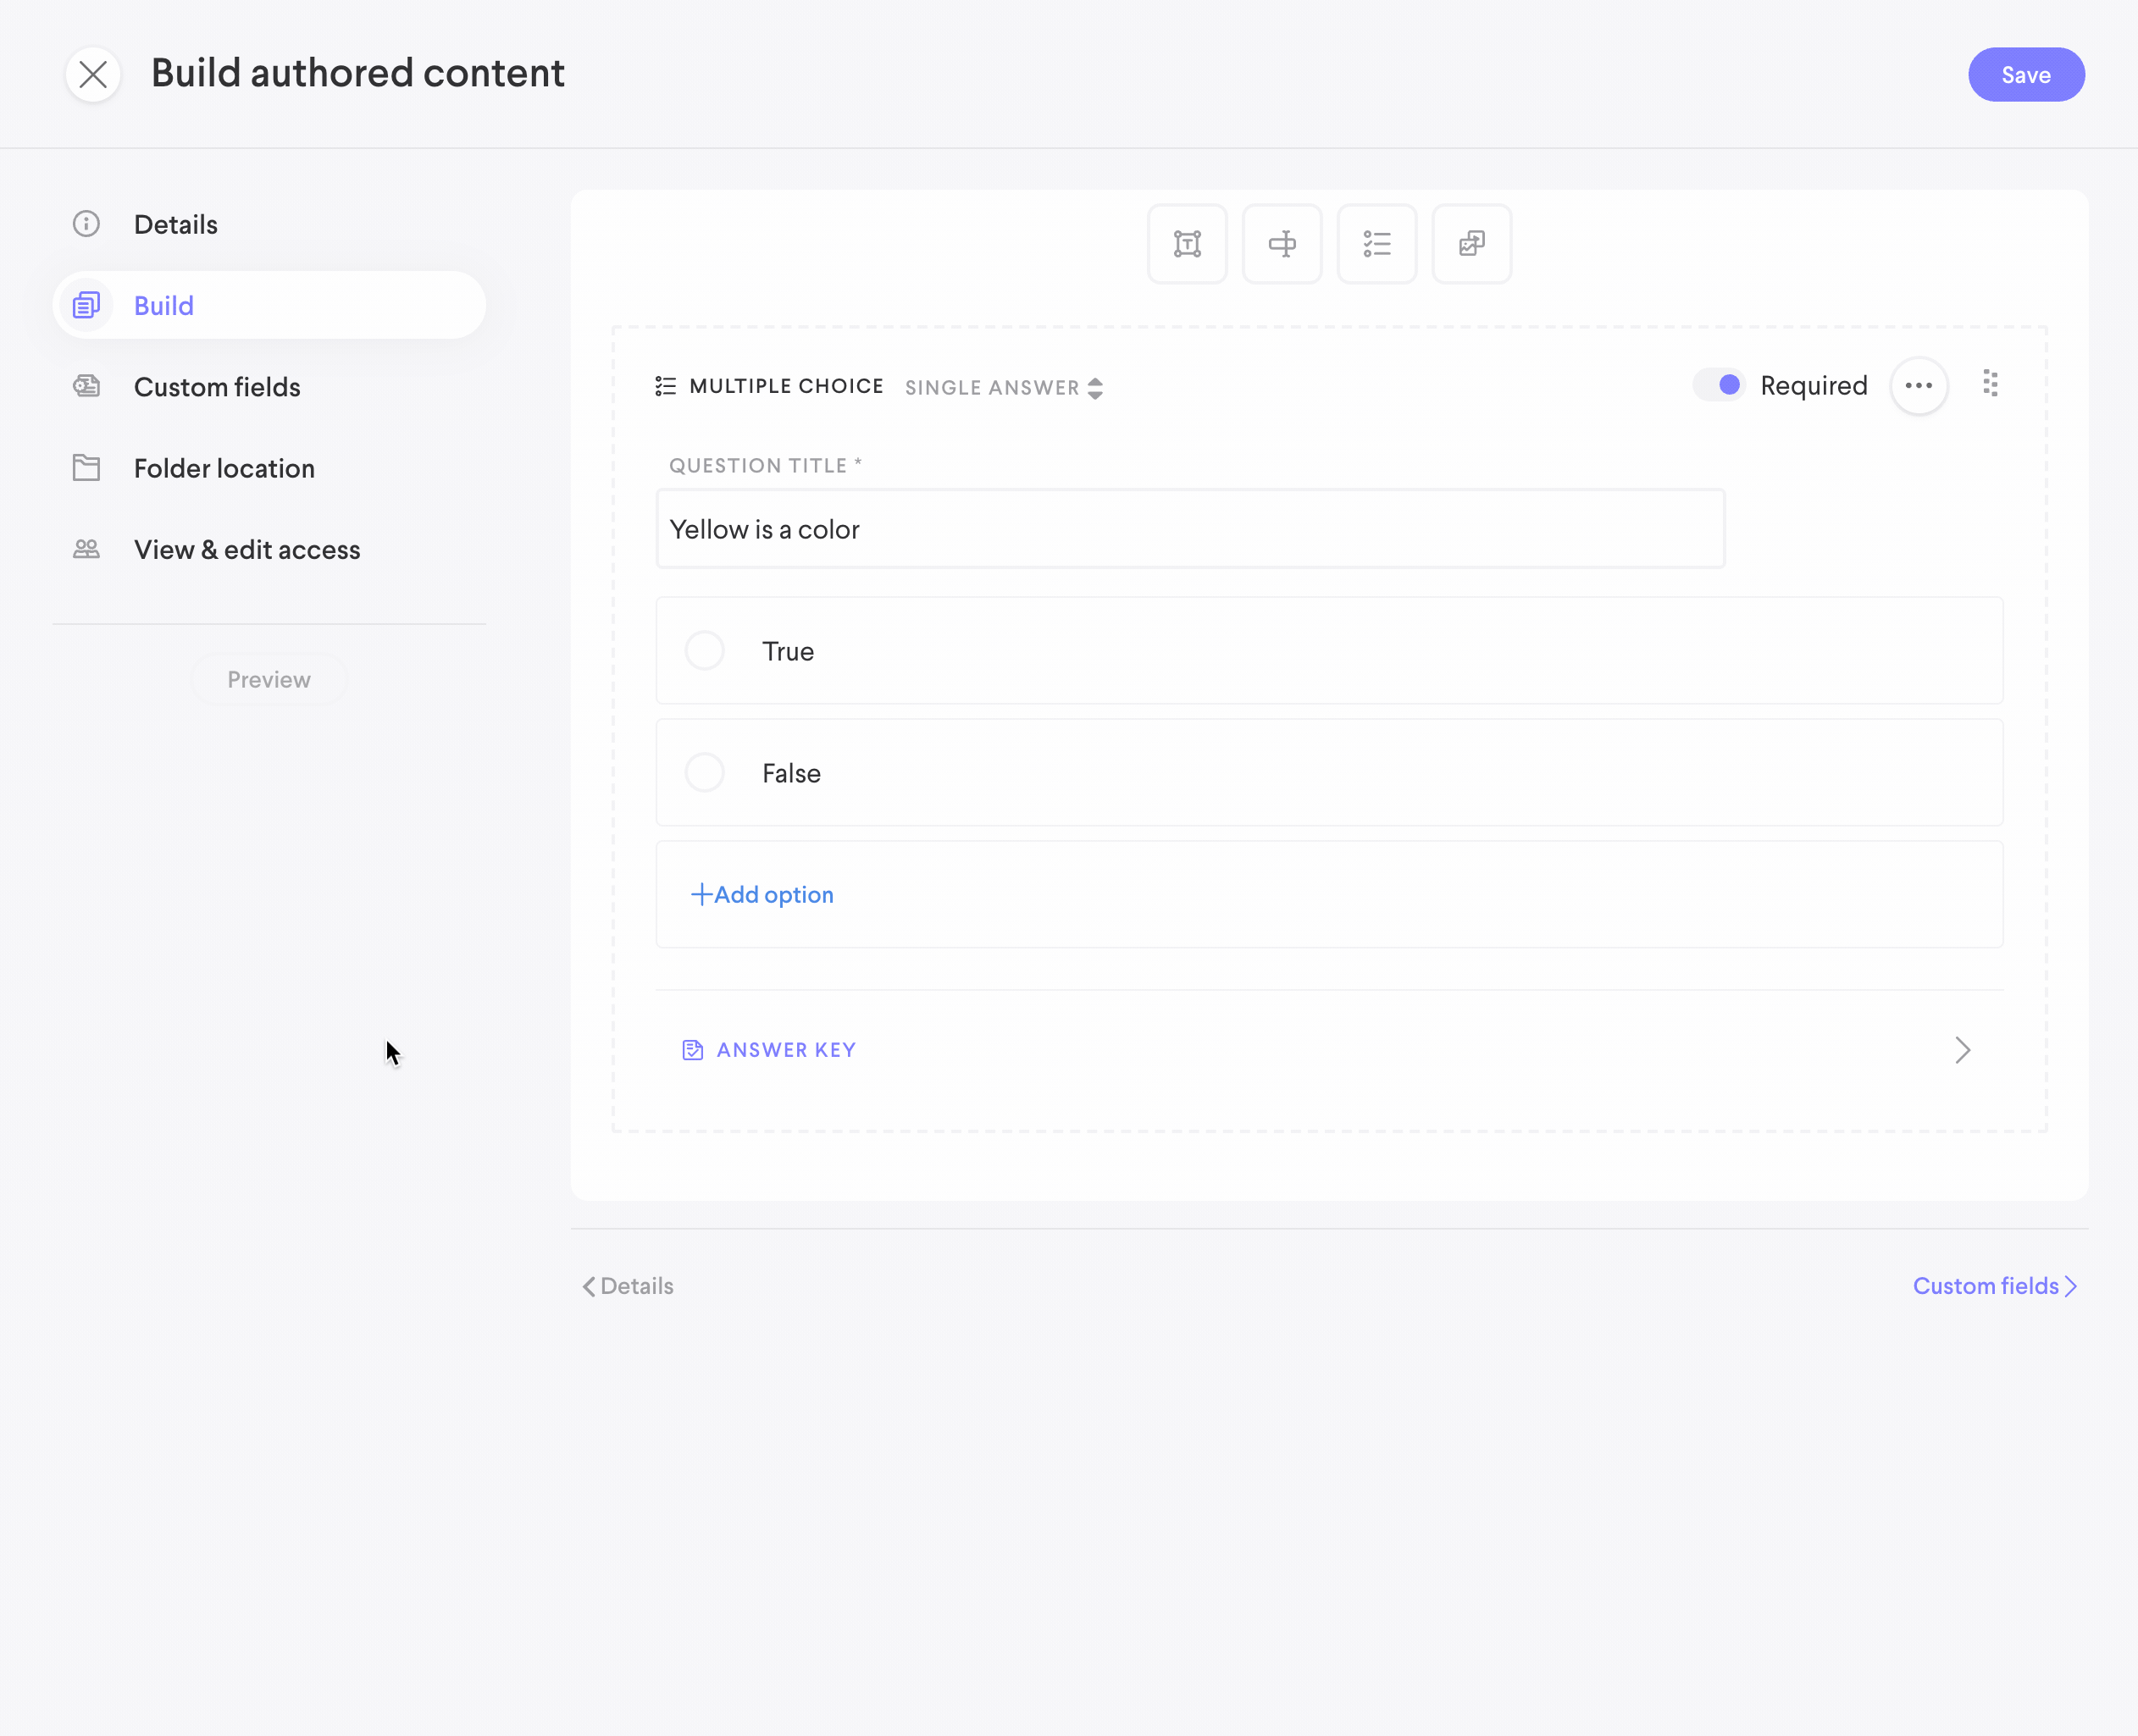
3. Multiple Choice
-
- Allows you to set both single answer or multiple choice type questions. There is no limit to the number of responses
- Radio: Only one answer can be selected (this type is compatible with partial credit)
- Checkbox: One to multiple answers can be selected
- Dropdown: Learners can select a single answer from one to many correct answers
- Allows you to set both single answer or multiple choice type questions. There is no limit to the number of responses
4. Media
-
- This lets you place images or videos into the content
- Image: Supports common file types such as PNG or JPEG
- Video: File must be .mp4
- You can also add a file to the form and learners will have access to download it
- Downloadable item
- Embedded
- You can embed a website when building. The app will check to see if the URL being added can be embedded as well as show available metadata from that site. This information is determined by the hosting site and Loop will display what is available.
- This lets you place images or videos into the content
Add to the canvas
You can add the block type of your choice to the canvas in two ways:
- Select the icon from the top. This will place the next block at the bottom of the canvas.
- Drag and drop the icon onto the canvas into the exact location you want it to be placed.
Move the blocks
You can move blocks on the canvas in two ways:
- By clicking and dragging on the 6 dotted icon in the upper right of each block.
- Blocks can be placed either stacked or side by side
- By using the Move up/Move down.Move over options in the three dot (...) context menu.
Replace media items
You can also replace media items within a block using the three dot (...) context menu rather than deleting a block and creating a new one.

Each question block can be set as Required or optional. Required blocks must receive a response before the learner can submit the authored content.


Create a survey
Provide open ended questions and single/multiple answer questions to generate feedback without using correct/incorrect answers or points.
- As a content admin, select the Folders & Content tab, then to the upper right of the table select the create action (+)
- Select Build authored content from the options
- Fill out the form fields as needed. (title is required)
- Leave the quiz configurations as is (disabled)
- Select the Build tab
- You can utilize all four block types when creating a survey
- You will not use the answer key for any blocks as a survey is meant to generate feedback without an incorrect answer.
Answer Key (Quizzes)
Response feedback, point scoring, and the answer key are all configured by selecting the Answer Key bar on the bottom of a question block's area. This will take you to a new screen layer where you can set which responses are correct, set feedback for correct/incorrect answers, and set the question's point value. If a question is open ended then you can set a general feedback response instead of a correct/incorrect one. The point value feeds into the overall scoring of the authored content item. The point value for both required and optional questions is counted towards the total for the content item.
When creating a Quiz, you will want to utilize the Answer Key for specific questions at the bottom of each Input or Multiple Choice block. You will see different information depending on the type of block you've selected.
Note: This information will not be shown to learners if you have chosen to Hide question results from Learners (detailed above in Quiz configuration).
Choose Correct Answers - Multiple Choice blocks
Select one answer for radio answer blocks. or select one to many answers for multiple answer blocks blocks.
Assign a point value - Multiple Choice blocks & Input blocks
Determine the number of points each block can earn when answered correctly. Radio blocks may contain partial credit point layouts. To create a radio block which contains partial credit, create responses but do not select a correct answer. This will allow you to set the point value for each response.
Correct, Incorrect, and neutral answer feedback
Add feedback that can be provided to the learner when they complete the content. This applies to multiple choice and input type blocks only. Creating feedback is optional. The type of feedback available will depend the block type and if a correct answer is selected.
Without a correct answer
Any block without a correct answer selected will have the option to display neutral feedback.
With a correct answer
Multiple Choice blocks with a correct answer selected may have correct or incorrect feedback. The exception is if partial credit is used, then feedback may only be neutral
Input blocks can have correct, incorrect, or neutral feedback depending on the block type and if a correct answer is selected. The types below are the only ones which may have a correct answer selected. The remaining input types may only have neutral feedback.
Correct/Incorrect feedback available
- Short answer
- Numeric
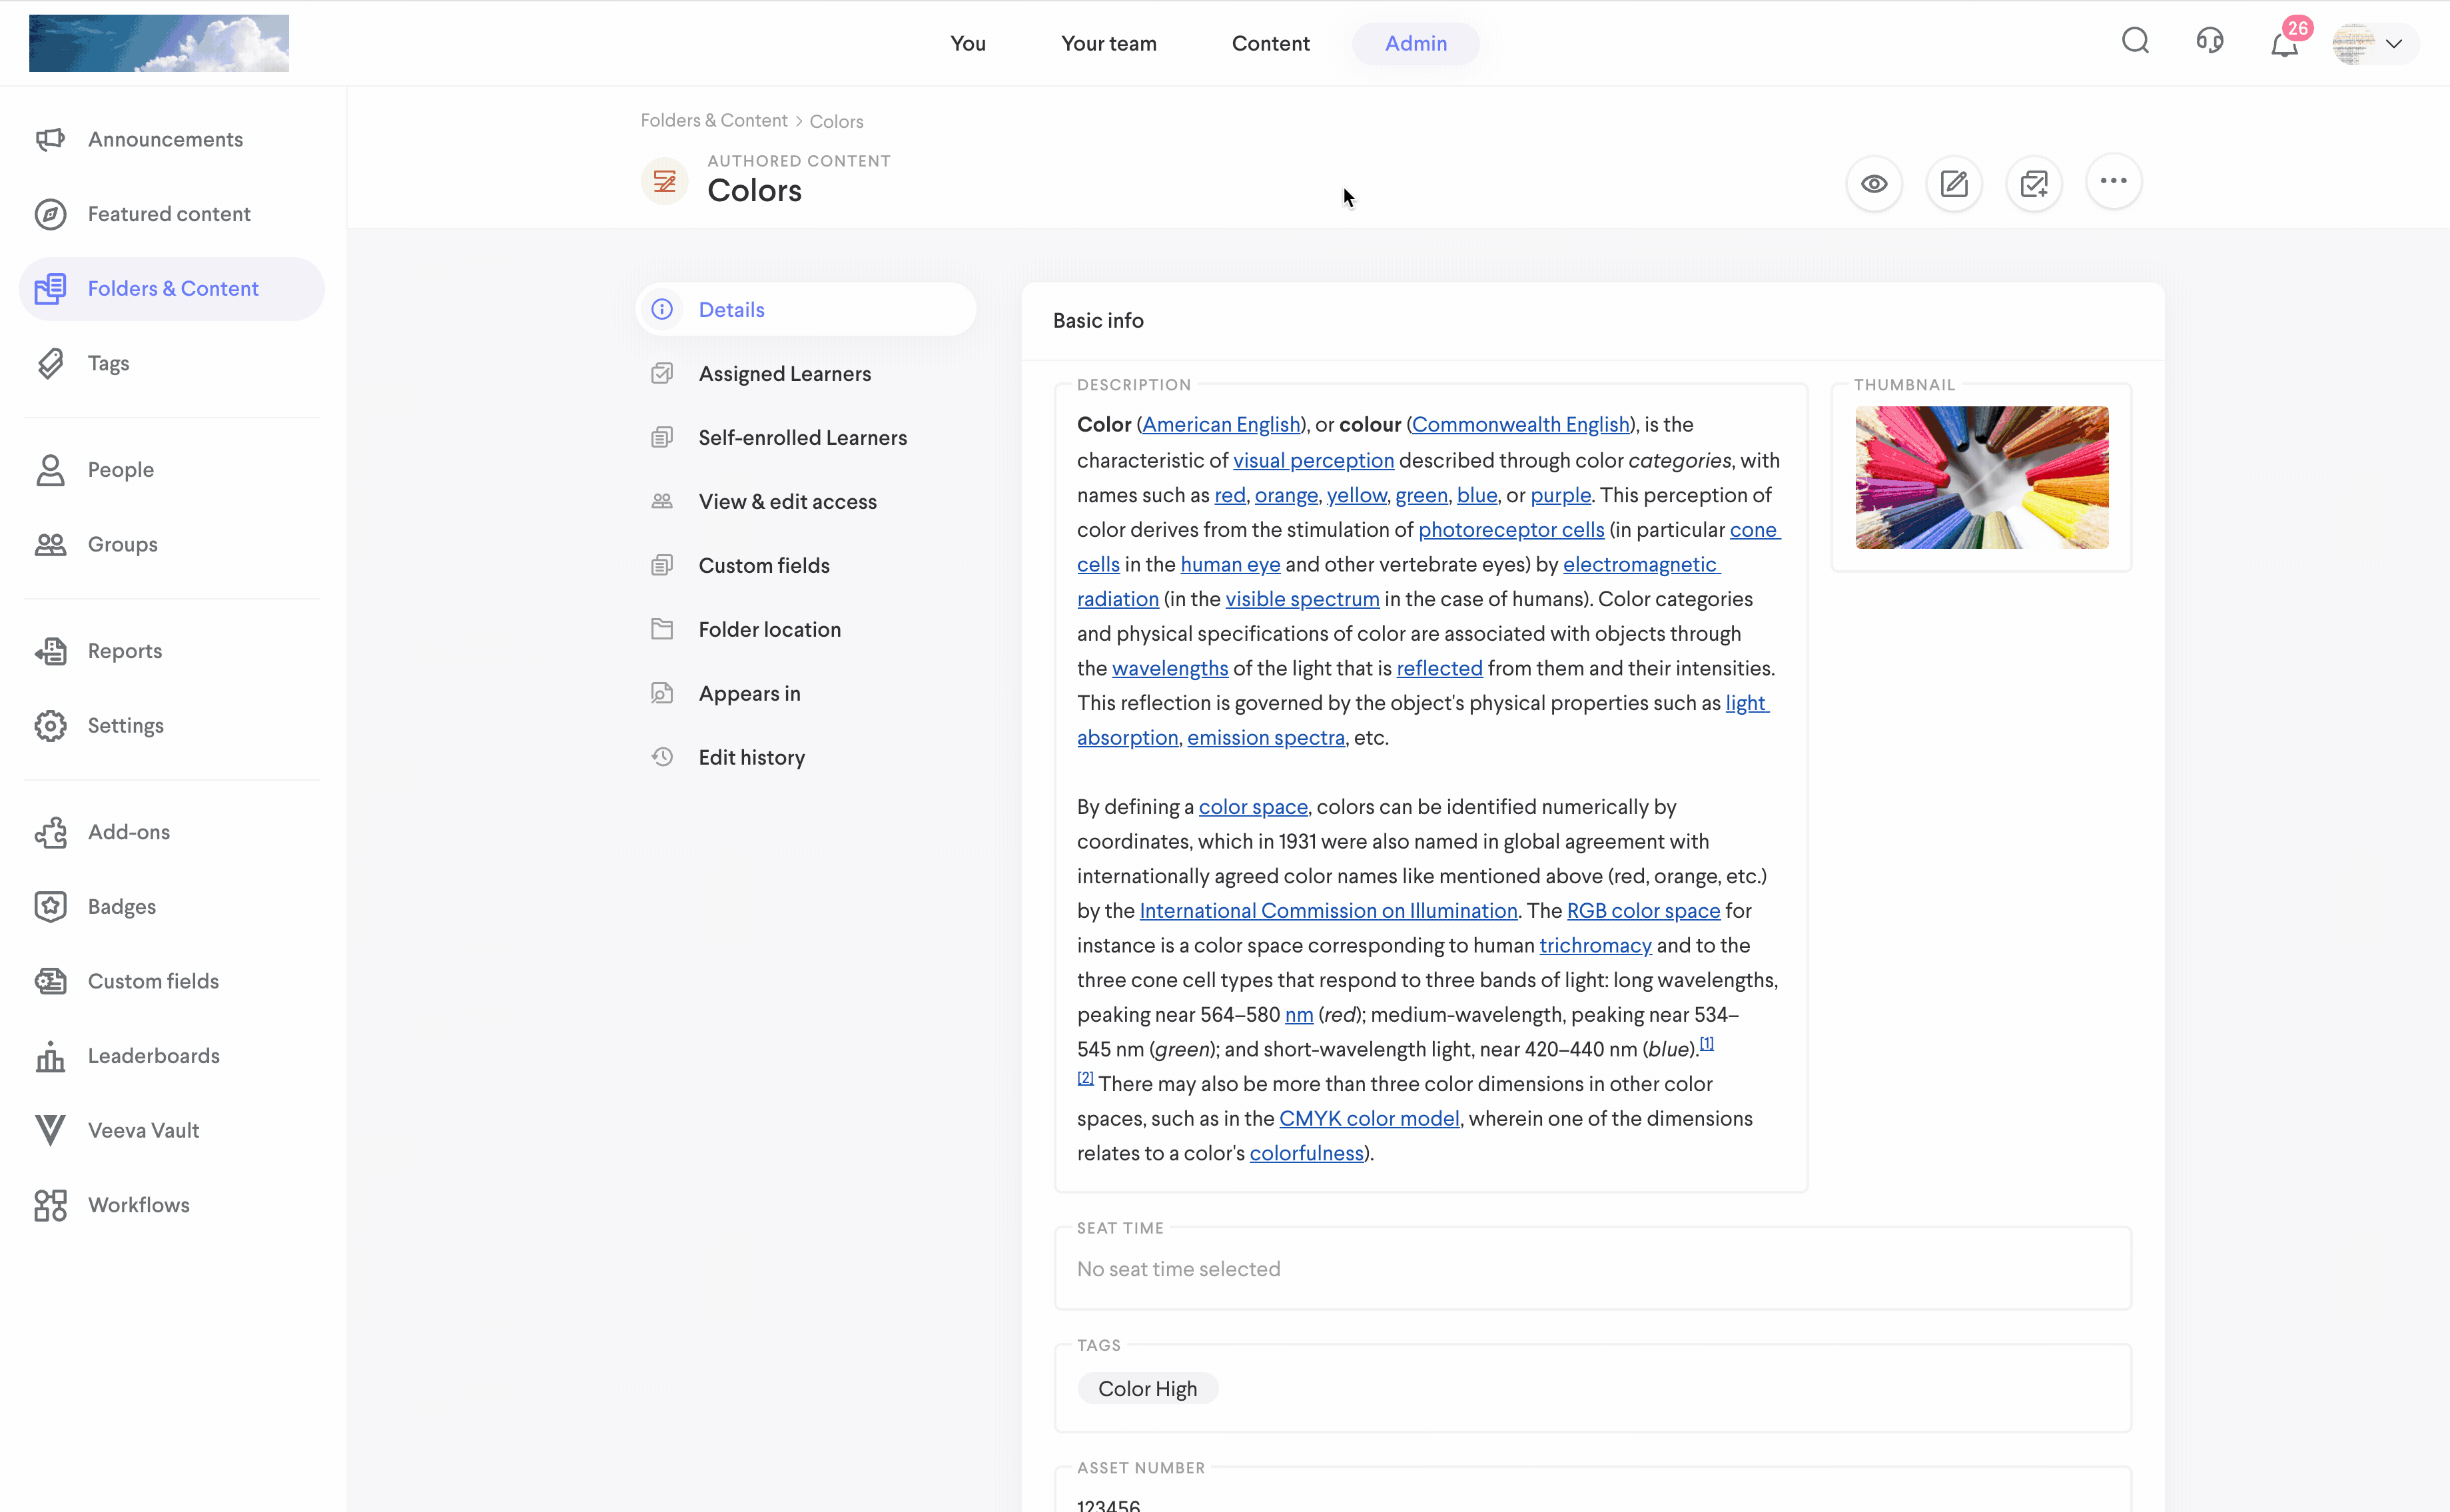
Once your build is complete and the required fields are filled, hit save to finish creation. After saving, you can preview what the learner will see by selecting the Preview icon from the details page
Comments
0 comments
Please sign in to leave a comment.