
Loop associates content to Learners using enrollments. This allows Coaches and Admins to track Assignments and completion. There are two types of enrollments: assigned enrollments and self-enrollments.
Assigned Enrollments
Assigning a content item to a Learner can be done in the following places:
- The content table
- The detail view of a content item
- The detail view of a Learner
- Your Team tab
You can assign any number of learners to any number of content items. Keep in mind though that depending on where you're accessing the assignment action the form may com pre populated with information. For example, assigning from the user detail will automatically add that user to the assignment form.
In order for an admin to assign content to Learners, the admin and the Learners in question must share at least one group.
When an admin assigns a content item to a Learner, an enrollment is created. The enrollment generates entries in two different tables:
- One entry places the content item in the Assigned tab of the Learner’s detail view.
- The other entry places the Learner in the Enrolled tab of the content item’s detail view.
Learners see their assigned enrollments in the Assigned table, which they can find by selecting the assignment button on the left on their You page. That looks like this:

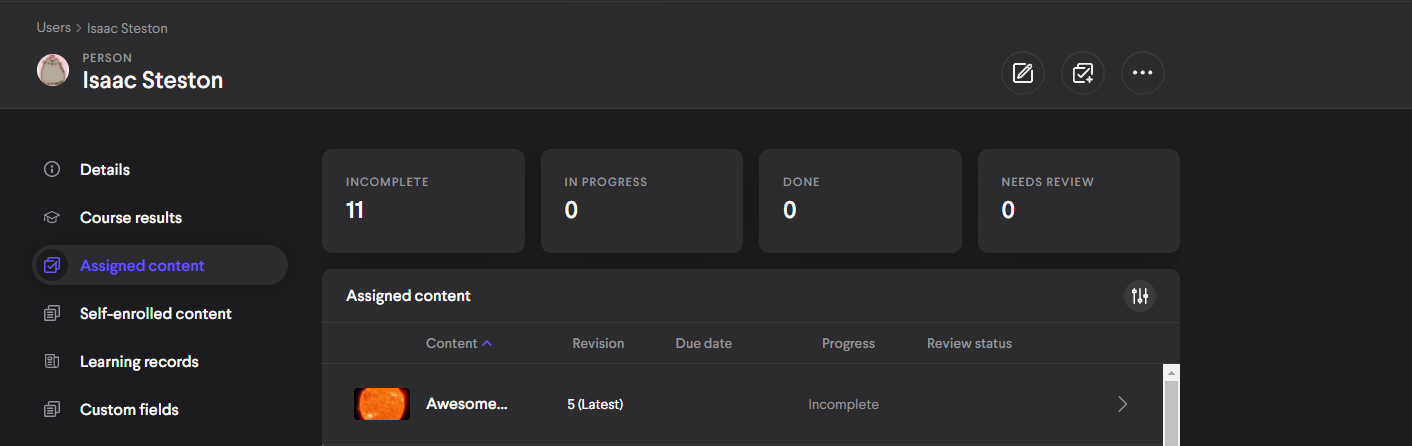
Enrollment within the Learner detail view looks like this:
The same enrollment from the detail view of the assigned content item looks like this:
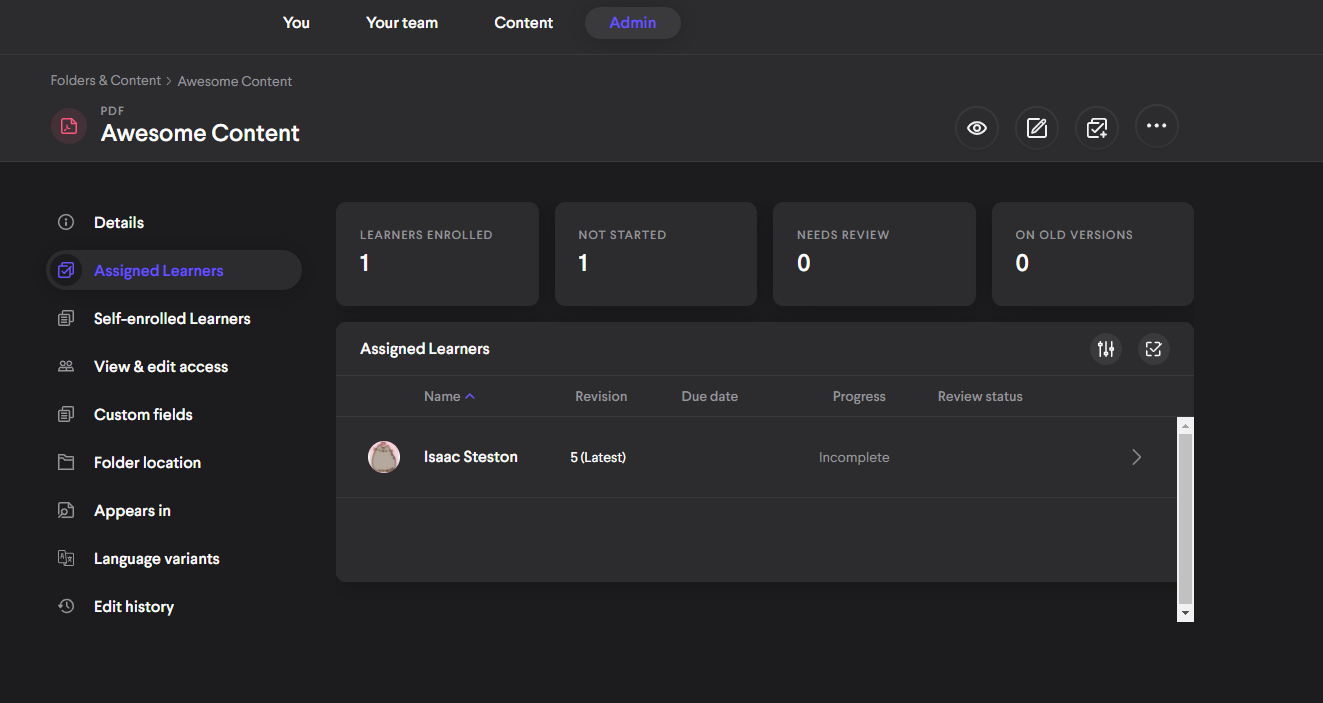
Selecting the entry in either table will produce the detail view of the enrollment. From here you can see all of the enrollment information including (but not limited to) progress, the timeline, revision, and date of the assignment.
Enrollment detail view of the same enrollment looks like this:
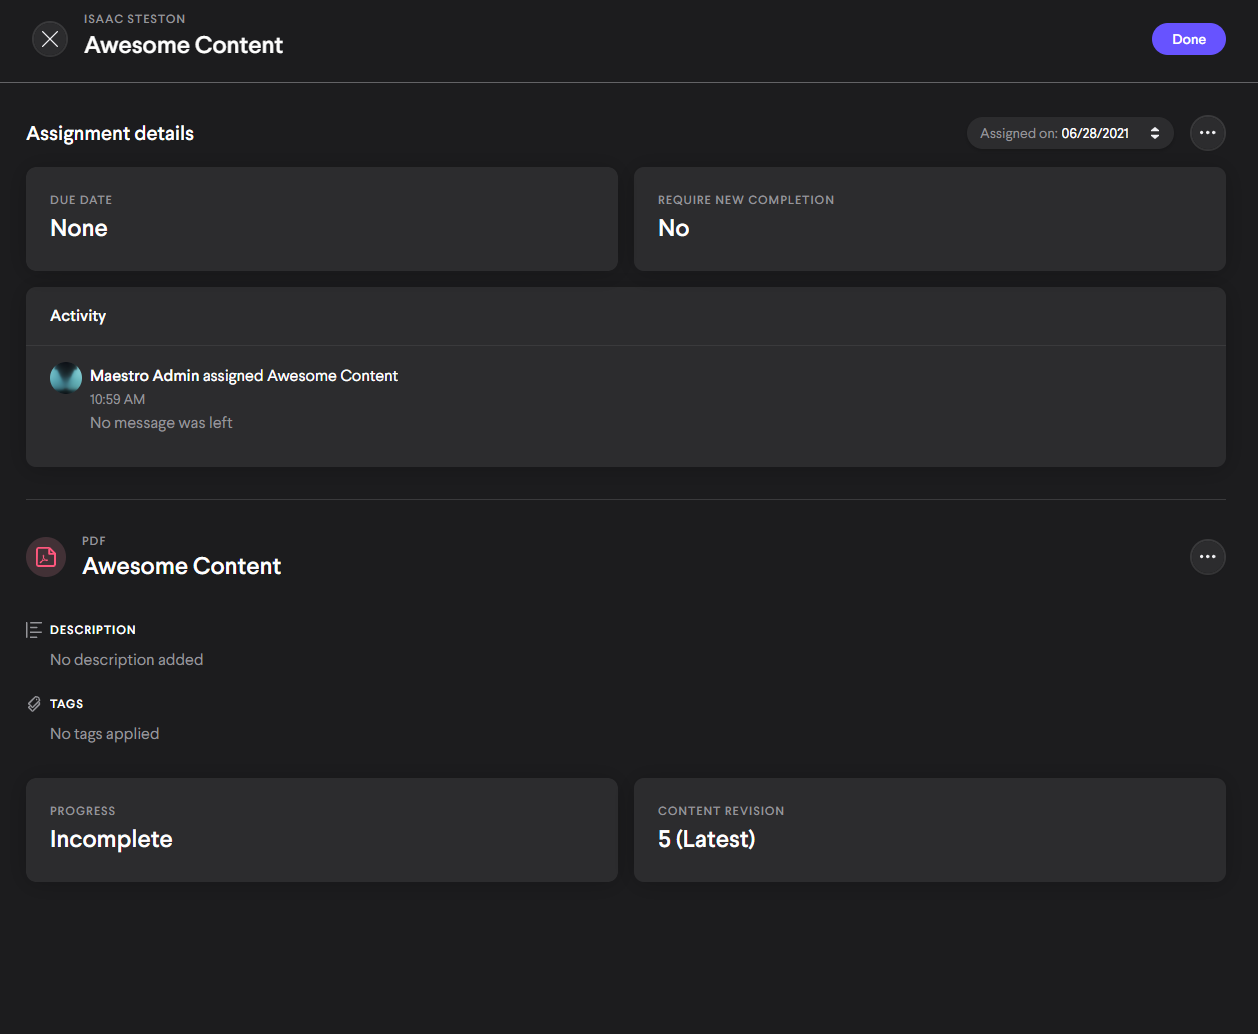
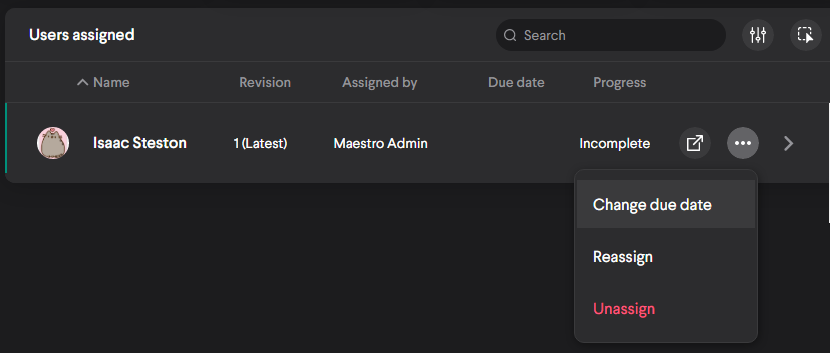
In the enrollment detail view and the content detail views, the admin has the ability to change the due date, available date, reassign, or unassign the enrollment.
The enrollment detail view with the action menu open looks like this:
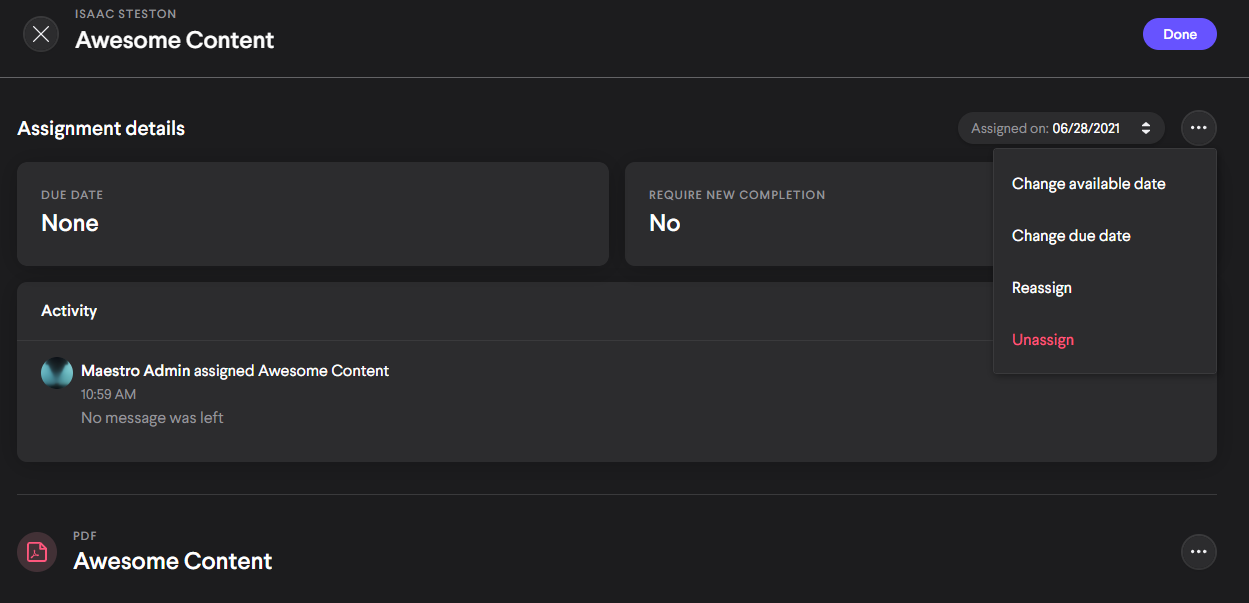
The assignment detail view with the context menu open looks like this:
Admin Enrollment Actions
The following are additional enrollment actions for admins:
Change due date: This action lets an admin change the due date of an enrollment. This can be done at any time, even after the due date has passed.
Change available date: You can apply or change the available date of the assignment with this option. If a date is set the assignment will show up in the Upcoming assignments section of the assigned user's assignment area but they will be unable to view or complete the assignment until the selected date has passed.
Reassign: This will reset all progress the Learner has made on the enrollment regardless of its completion status, so use it wisely! This action opens the assignment panel again letting you adjust any of the assignment options. The reassign option has the following effects:
- All reassigned Learners gain a new notification and entry in their assignment tables.
- All progress is reset regardless of completion status or score. (progress can still be auto applied if allowed)
- The content version is updated to the latest version.
- A new entry is generated in the Assigned on field within the enrollment detail view.
- New due dates, messages, assigned by, and compliance options are applied.
Unassign: This action will destroy the latest enrollment and remove the content item in question from the Learner’s assignment table. Since it's possible for Learners to accumulate multiple enrollments over time for the same content item, it might seem like nothing has happened after you select unassign. That's because the latest enrollment was removed and the table now shows the enrollment that came before it — to completely dissociate a Learner from a content item’s Assigned table, you might need to unassign multiple times in order to remove all enrollments.
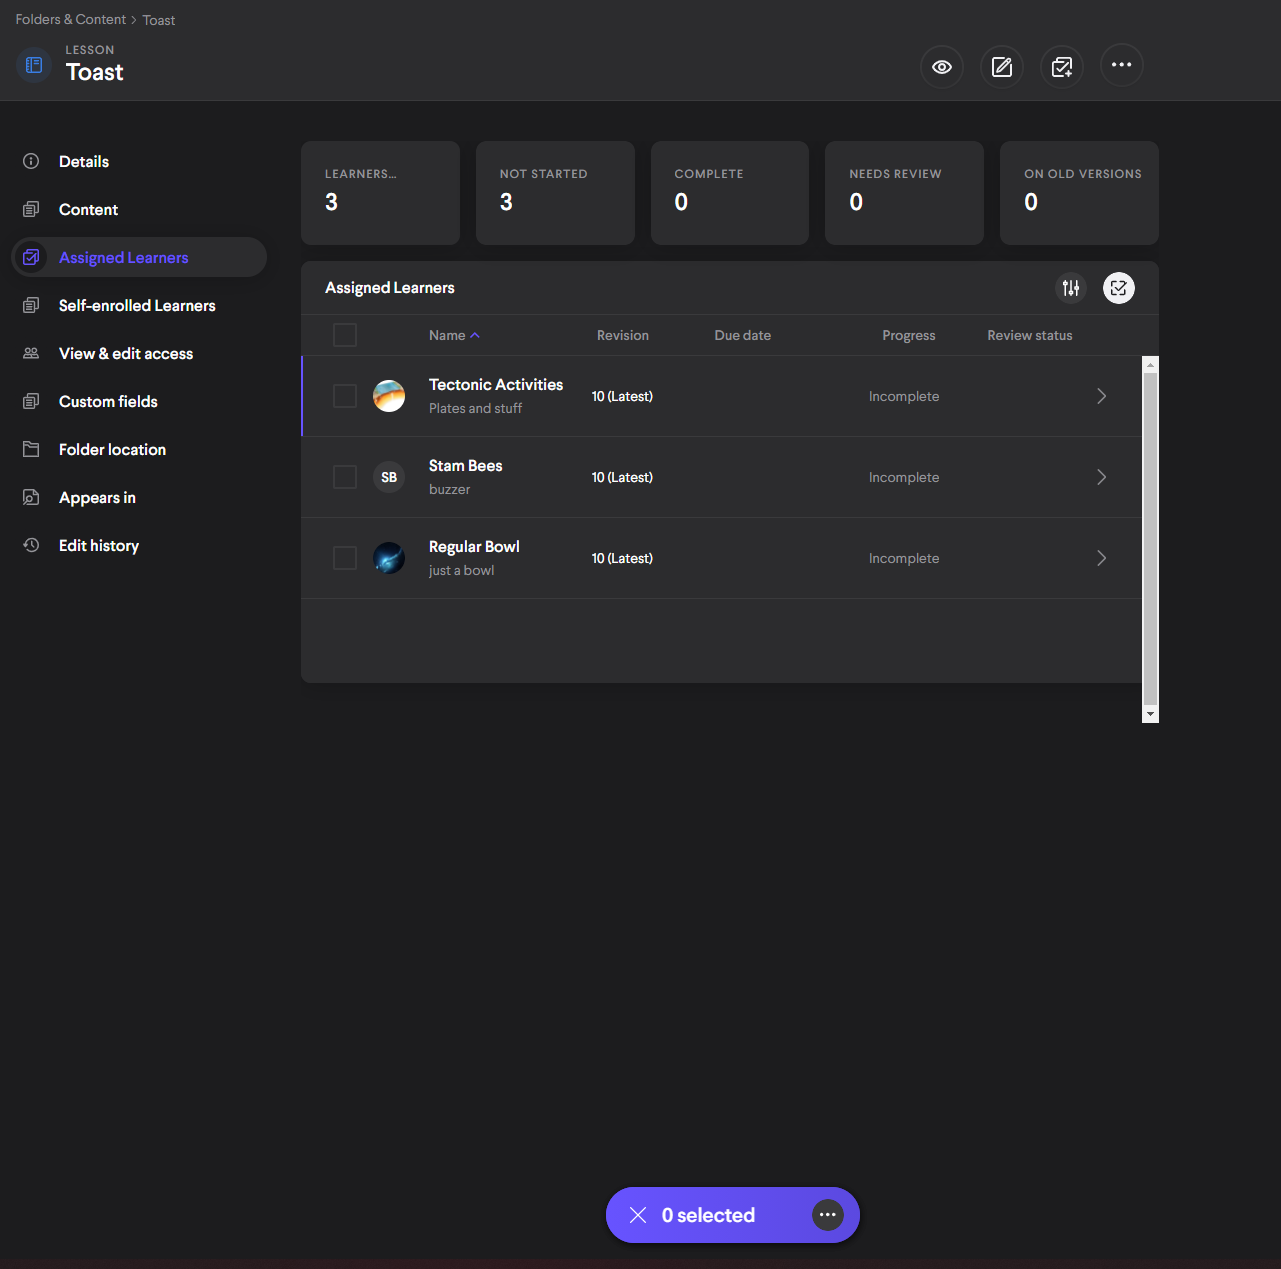
Bulk Action: When viewing assigned enrollments from within the detail view of a content item at the Assigned tab, you can apply an action to multiple enrollments at once for maximum efficiency. Here's how:
1. First, select the bulk action button to shift the enrollment table to the bulk action mode.
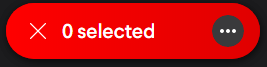
The bulk action button looks like this

2. This will produce a menu at the bottom of the table with an additional action button within the container. Check boxes will appear next to each table item, and you'll see this:
3. Select the enrollments you want to change, then select the context menu button to select an action.
4. Select the action you wish to perform, then follow any prompts or forms that appear and confirm them. This will apply the action to all table items selected. Nice!
Here's an enrollment table within the detail view of a content item in the bulk action state:
Self Enrollments
Learners can also complete content on their own, without admin assignment. Look at you, self-starter!
Here's how:
- Opens a content item from the Content tab.
- Start (or complete) the content item, and a Self Enrollment will automatically be generated. That's it!
This will create an entry in the Self Enrollment tab, in both the detail view of the content item and the detail view of the Learner. Unlike assigned items, an admin has no control options over a self enrollment. They can only retrieve information from the enrollment’s detail view which is accessed by selecting the enrollment from the tables in which it appears.
Comments
0 comments
Please sign in to leave a comment.